There’s a special kind of excitement that comes with unboxing a new pair of boots. You envision the adventures you’ll have, the outfits you’ll complete, and the confident stride you’ll own. Then, you take your first step, and reality hits: a pinch here, a rub there, and the sinking feeling that your stylish new companions are, frankly, a pain to wear.
If this sounds familiar, don’t despair. Uncomfortable new boots are a universal experience, and it’s rarely a sign that you bought the wrong size. Instead, it’s a simple matter of materials and mechanics needing time to adapt to the unique shape of your feet. Here’s a look at why this happens and, more importantly, five expert-approved tricks to speed up the process and achieve perfect comfort.

Why Are New Boots So Uncomfortable?
Think of new boots not as finished products, but as semi-rigid structures that need to be molded. The primary culprits of discomfort are:
- Stiff, Unyielding Materials: High-quality leather, suede, and synthetic materials are initially rigid to provide structure and durability. They haven’t yet developed the flex points that match your foot’s natural movement.
- Pressure Points: Seams, stitching, and the heel counter (the stiff cup at the back of the heel) are often the stiffest parts. Until they soften, they can rub against your skin, causing blisters and hot spots.
- Lack of Interior Space: The insole and footbed are still flat and uncompressed. They need to be “worn in” to create subtle depressions for your heel, ball, and toes.
- Overall Fit and Flex: A boot that fits perfectly when standing might feel tight across the instep or restrictive in the ankle when you walk, as the boot’s flex point hasn’t yet been established.
The good news? You can actively encourage this breaking-in process rather than just suffering through it.
5 Expert Tricks to Break Them In Fast
Forget the old-fashioned method of just “toughing it out.” These smarter, faster techniques will save your feet and your patience.
1. The Strategic Sock Method
Don’t just wear any socks. For a targeted break-in session at home, use a two-sock system.
- Step 1: Start with a thin, moisture-wicking sock liner.
- Step 2: Pull a thick, cushioned wool or cotton sock over it.
- Step 3: Put your boots on and wear them for an hour or two while doing household chores.
The double layer increases gentle pressure on the boot’s interior, helping to stretch the material while protecting your skin from friction. This is one of the most effective footwear comfort tips for accelerating the process.
2. Controlled, Localized Heat
Heat makes leather more pliable. The key is to apply it gently and precisely.
- The Blow-Dryer Technique: Put on your boots with thick socks. Use a blow-dryer on a medium heat setting to warm the tightest areas (like the toes or heels) for 20-30 seconds at a time. While the material is warm, flex your feet, walk around, and do squats to help mold the boots. Let them cool completely on your feet.
Warning: Always keep the dryer moving to avoid overheating and damaging the leather.
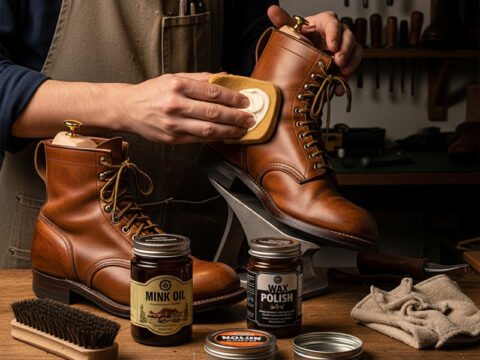
3. Use a Professional Leather Conditioner
Stiff leather needs to be softened from the inside and out. Applying a quality leather conditioner or leather cream (test on a small area first) can work wonders. The conditioner rehydrates the fibers, making them more supple and less resistant to bending. Apply it lightly, let it absorb, and then wear the boots. This is a cornerstone of effective leather boot care.
4. Target Problem Areas with a Stretcher
For persistent pinch points, a boot stretcher is your best friend.
- For General Tightness: Use a two-way stretcher that expands in both width and length. Leave it in for 24-48 hours.
- For Specific Spots: Many stretchers come with “pressure plugs” – small, hard bumps that you can position from the inside to stretch out a single, painful seam or a tight spot over a bunion.
5. The Gradual Wear-In Plan
The most natural method is still highly effective if done correctly. The secret is short, incremental wear sessions.
- Day 1: Wear for 1-2 hours indoors.
- Day 2: Wear for 2-3 hours.
- Day 3: Wear for a half-day.
Gradually increasing the time allows the materials to adapt without overwhelming your feet. Never start with a full-day outing, as this is a guaranteed way to get severe blisters.
What NOT to Do
In your quest for comfort, avoid these common mistakes:
- Don’t soak them in water. This can damage the leather, weaken the glue, and cause the boots to lose their shape.
- Don’t freeze them. The popular “bag of water in the freezer” trick is a myth. It doesn’t provide consistent, controlled stretching and can harm the materials.
- Don’t use harsh chemicals or rubbing alcohol as makeshift softeners, as they can dry out and discolor the leather.
Final Step: Protect Your Feet
While you’re breaking in your boots, protect yourself. Always use quality socks and have moleskin or blister bandages on hand. Apply them to known hot spots before you feel the rub. This lets you continue the break-in process pain-free.
Breaking in new boots doesn’t have to be a battle. With these expert tricks to break in boots fast, you can transform your uncomfortable new purchases into the most comfortable, custom-fitting footwear you own. A little patience and the right technique are all it takes to move from pain to perfection.